- To register AmzMonitor with 14 Days Free Trial click on `Start Free Trial` button. You will be directed to the initial setting wizard as soon as you register AmzMonitor.
-
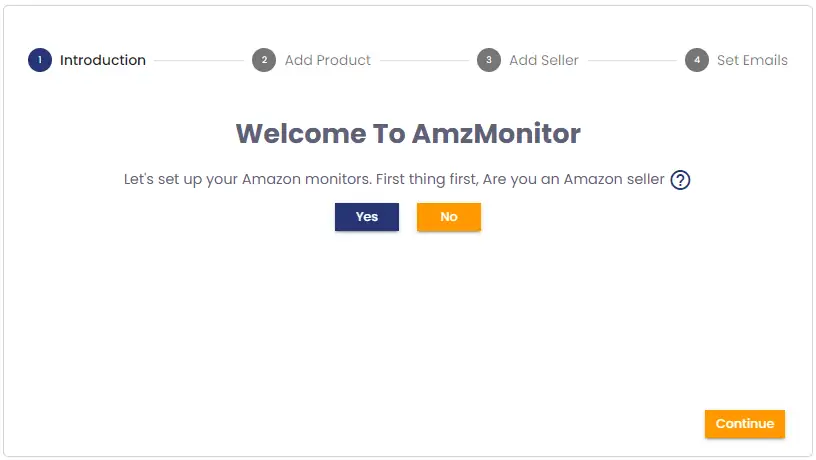
Step 1-Introduction: You need to give your Amazon store details. If you are not an existing Amazon seller, click on No and continue with the next step.
-
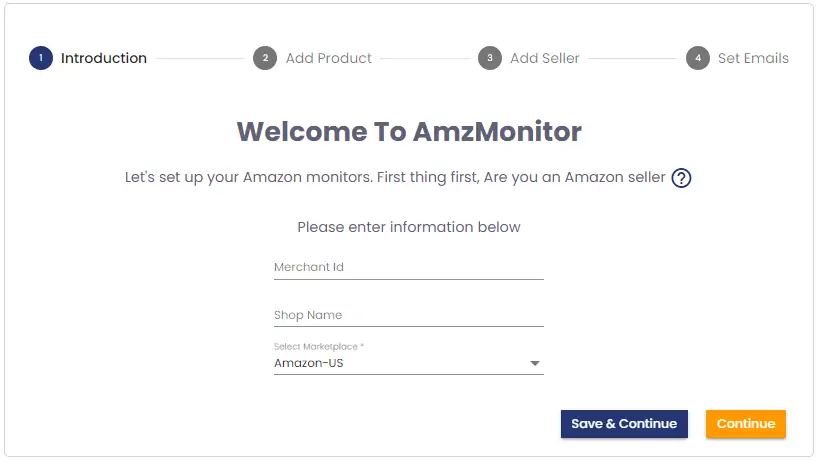
If you are an existing Amazon seller, click on Yes. Add your Amazon store details to have an easy monitor setup and comparative AmzMonitor reports. To do this add your Merchant ID, give your shop name and select your Amazon marketplace.
-
If you are an existing Amazon seller, click on Yes. Add your Amazon store details to have an easy monitor setup and comparative AmzMonitor reports. To do this add your Merchant ID, give your shop name and select your Amazon marketplace.
-
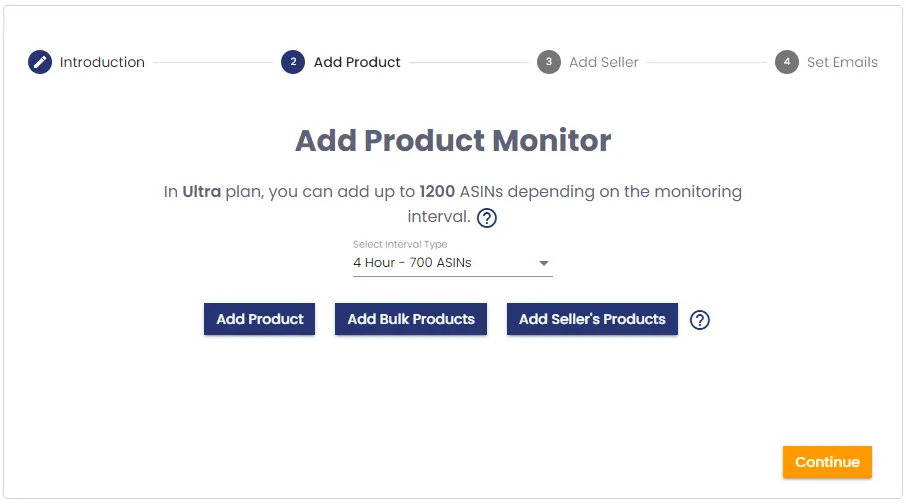
Step 2-Add Product: You need to add products to monitor. Before that, you need to select your monitoring interval from every 2 hours to every 24 hours. The number of monitored Products (ASINs) depends on your monitoring interval.
-
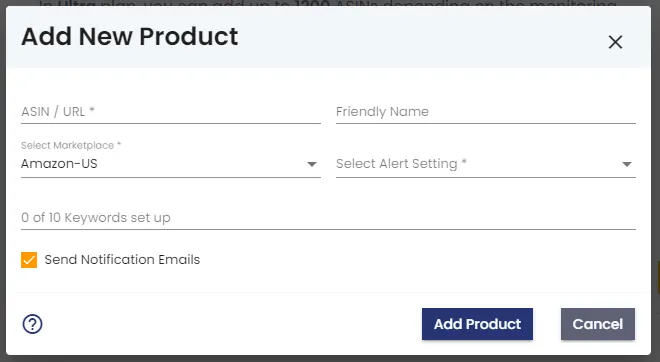
To add products, you have 3 options. To insert a single product, click on `Add Product` button. On the pop-up screen, insert the ASIN number and select the marketplace. You have the option to add up to 5 keywords for the product. Type your keywords separated with commas. You can also give a friendly name for the product. You also need to determine your alert setting from pre-determined alert settings (Detailed, Default, Only Pricing, or Only Listing). However, you have the option to add a custom product alert setting. Please refer to Add Custom Product Alert Settings on the HowTo page.
-
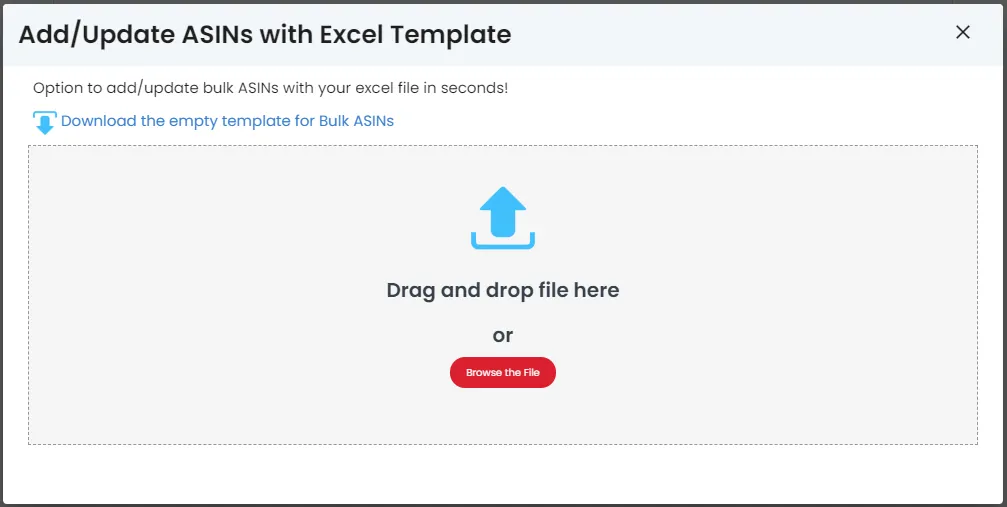
To insert bulk products, click on `Add Bulk Products` button. On the pop-up screen, click on `Download the empty template for Bulk Products`. Prepare your excel file and save it on your computer. Then drag and drop or upload the excel file onto the box located on the popup screen.
-
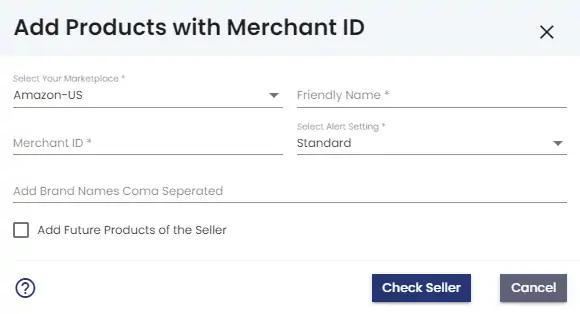
To insert the products of an Amazon seller, click on `Add Seller Product` button. On the pop-up screen, select the marketplace, add the Merchant ID of the seller and give a friendly name for the seller. You can narrow down the seller products with brand names. Add multiple brand names with comma-separated. You can also monitor the future products of the seller. To do this, click on the box next to `Add Future Products of the Seller`.
-
To add products, you have 3 options. To insert a single product, click on `Add Product` button. On the pop-up screen, insert the ASIN number and select the marketplace. You have the option to add up to 5 keywords for the product. Type your keywords separated with commas. You can also give a friendly name for the product. You also need to determine your alert setting from pre-determined alert settings (Detailed, Default, Only Pricing, or Only Listing). However, you have the option to add a custom product alert setting. Please refer to Add Custom Product Alert Settings on the HowTo page.
-
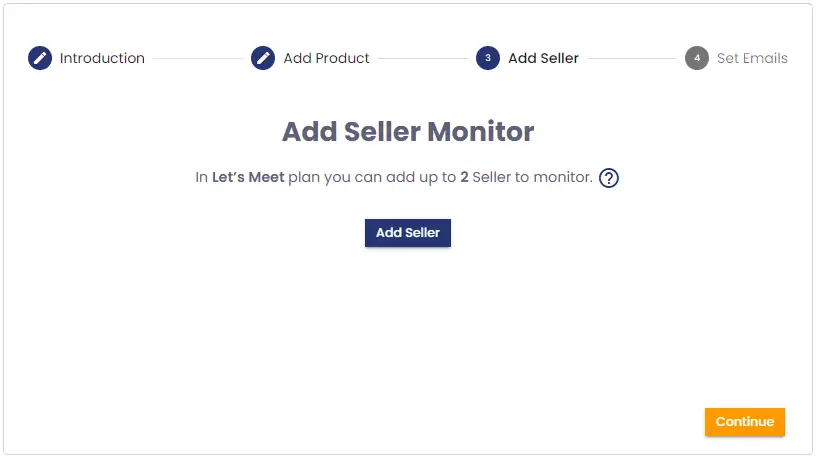
Step 3-Add Seller: You can add seller monitors. Click on `Add Seller` button.
-
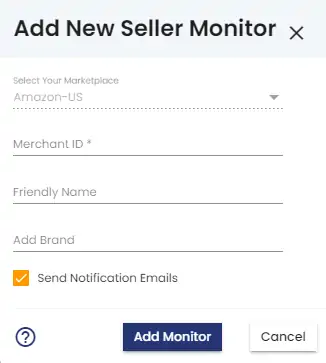
On the pop-up screen, add the Merchant ID and select the Amazon Marketplace of the seller. You can narrow down the seller products with brand names. Type your brands separated with commas.
-
On the pop-up screen, add the Merchant ID and select the Amazon Marketplace of the seller. You can narrow down the seller products with brand names. Type your brands separated with commas.
-
Step 4-Set Emails: As the last step, you can set the list of the email addresses that you want to get AmzMonitor notifications. You have the option to add up to 5 email addresses together with your account email address.
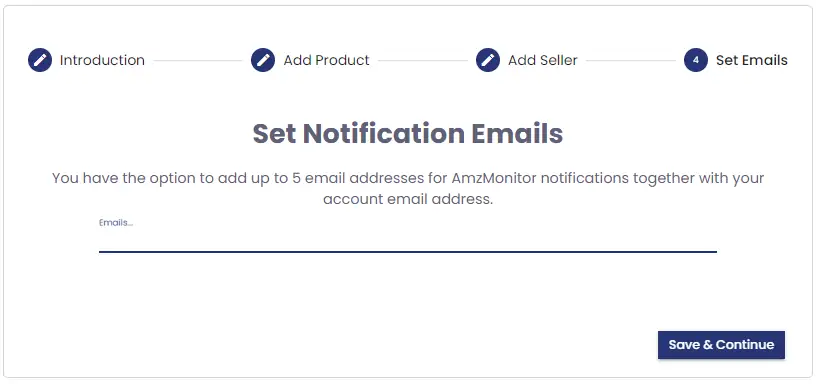
- Click on `Save&Continue` button. Now, your settings are ready to start AmzMonitor services.

